
Interested In Learning More?
To find out how LegacyMaker can revolutionize your life and business and unlock your mental freedom, enter your information below and a member of our team will be in contact with you!
By providing your information you are consenting to the collection and use of your data in accordance with our Terms of Service and Privacy Policy.
Limited Time – Save BIG With The 'Founders Plan'!
[Projects] How To Start A New Project
Thursday, October 05, 2023
Transforming an idea in your head into a working project shouldn’t be complicated. This step-by-step tutorial will show you exactly how to get started building your first project.
Objectives:
- Start a new project via the left project panel or the upper toolbar
- Add a title and subtitle
- Add a project cover image
- Use ImaGen to generate a custom AI image
Prior to getting started, you will need to have the following:
- An active LegacyMaker account
- An internet connection
Step by Step Walkthrough:
STEP #1:
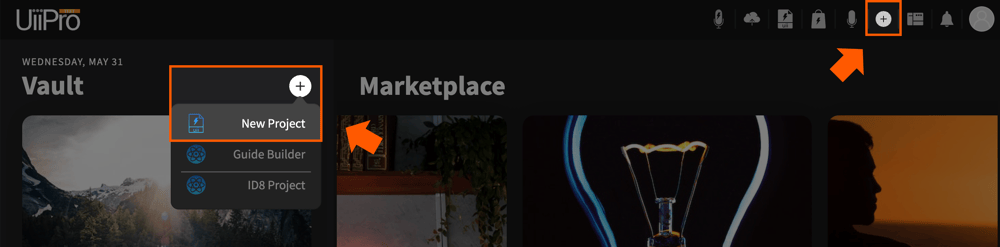
From your dashboard, click the white plus icon on either the left project panel or the upper toolbar, and select New Project.
STEP #2:
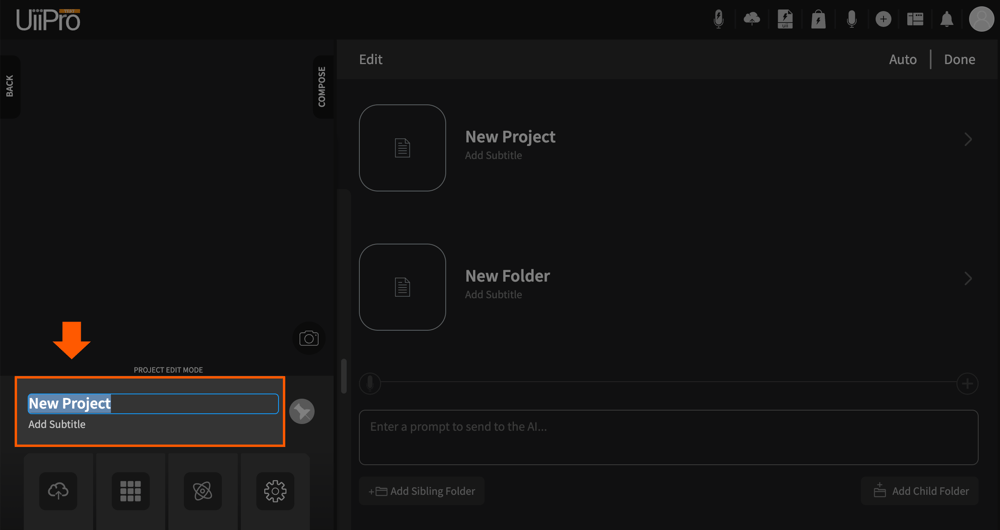
Add a title and subtitle to your project on the left project panel.
STEP #3:
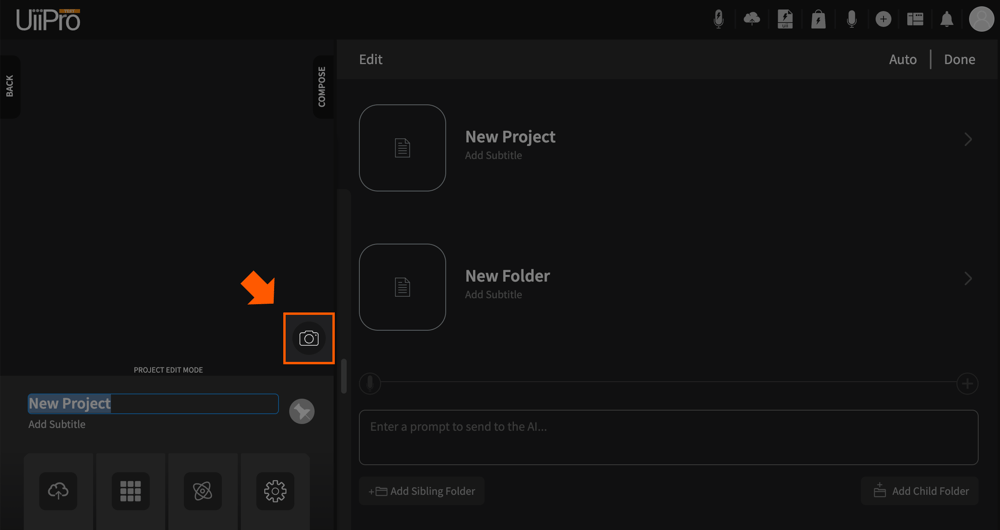
To add a project cover image, click the camera icon on the lower right corner of the image window on the left project panel.
STEP #4:
To generate a custom image, click the ImaGen tab and enter some text into the AI prompt box describing the image you would like created. When you’re ready, click send. (You may also Upload an existing image, search Unsplash for a free stock photo, or browse your Gallery.)
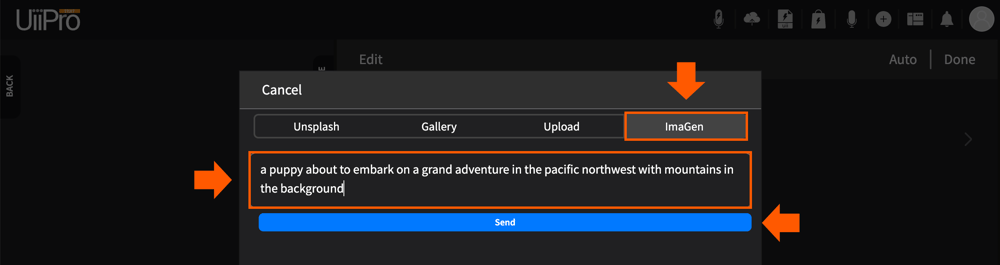
STEP #5:
Once your image has loaded below the prompt box, you can either click on the image to use it in your project, or edit your prompt and click Send to generate a new version.
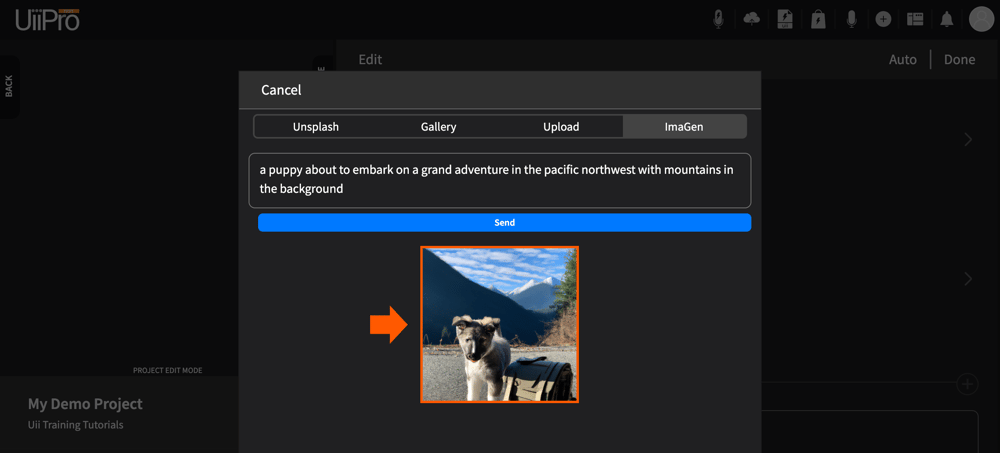
STEP #6:
When prompted, click Select to add your image to your project.
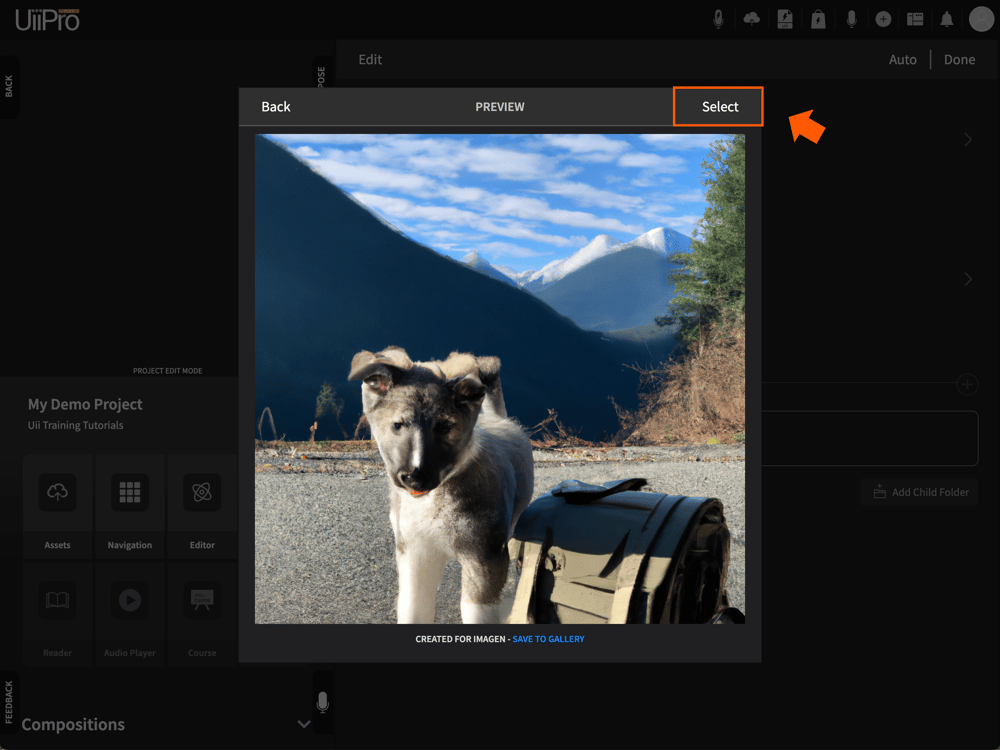
STEP #7:
Your image and the corresponding color palette will automatically populate across your project.
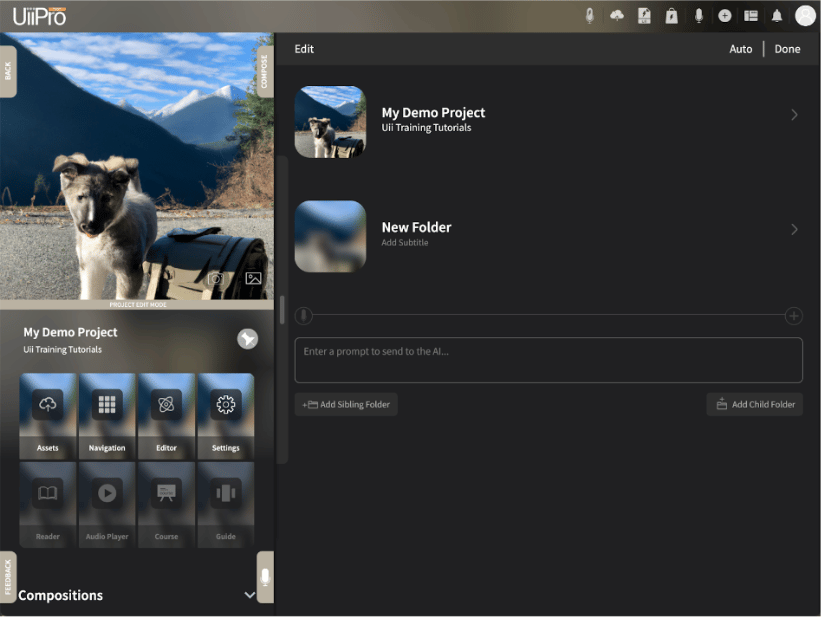
Congratulations, you have successfully started a new project. For more guidance on this topic, be sure to check out these related tutorials:
If you have any additional questions, please contact our Support Team at support@legacymaker.co.
RELATED POSTS

LegacyMaker’s instant transcription feature makes it quick and easy to convert your raw audio content into an editable text format, and this step-by-step tutorial will show you exactly how.

This step-by-step tutorial will show you how quick and easy it is to capture your ideas in an organized manner using the Legacy recorder.

Adding content to a folder can be done using the Editor or the Navigation page, but keep in mind that some of the AI-assisted features are not available within Navigation. In this tutorial, I’ll show you how to add content to your project folders using the Editor.

Once you have a project started, there are two ways you can add folders: using the Editor or using Navigation. Both options achieve the same ultimate result, but offer two unique visual experiences depending on your preference. In this tutorial, I’ll show you how to add folders using Navigation, which operates in more of a hierarchical format.
Once you have a project started, there are two ways you can add folders: using the Editor or using Navigation. Both options achieve the same ultimate result, but offer two unique user experiences depending on your preference. In this tutorial, I’ll show you how to add folders using the Editor.
© 2024 ILUVMFG Media, LLC. All Rights Reserved.
PO Box 7846 Bonney Lake, WA 98391