
Interested In Learning More?
To find out how LegacyMaker can revolutionize your life and business and unlock your mental freedom, enter your information below and a member of our team will be in contact with you!
By providing your information you are consenting to the collection and use of your data in accordance with our Terms of Service and Privacy Policy.
Limited Time – Save BIG With The 'Founders Plan'!
[Recorder] Using The Digital Recorder
Wednesday, October 18, 2023

The most revolutionary ideas are nothing more than fleeting thoughts if they never actually make it out of your head… When your entrepreneurial mind is stuck on overdrive, capturing your endless stream of ideas before they vanish can feel like trying to drink from a firehose!
This step-by-step tutorial will show you how quick and easy it is to capture your ideas in an organized manner using the Legacy recorder.
Objectives:
- Locate the Digital Recorder icon in the Upper Toolbar
- Change the default "Save To" folder
- Start, pause, and end a new recording
- Title and upload a recording to your account
- Access your recordings via the Uploads folder
- Return to your dashboard
Prior to getting started, you will need to have the following:
- An active LegacyMaker account
- An internet connection
Step by Step Walkthrough:
STEP #1:
From your dashboard, click the microphone icon on the upper toolbar to open the Digital Recorder in a new window.

STEP #2:
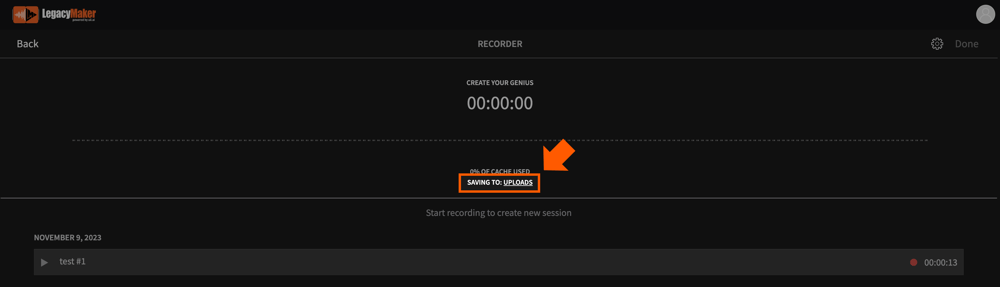
Before starting a session, locate the “Saving To” link to ensure your file is being saved to the correct folder.
STEP #3:
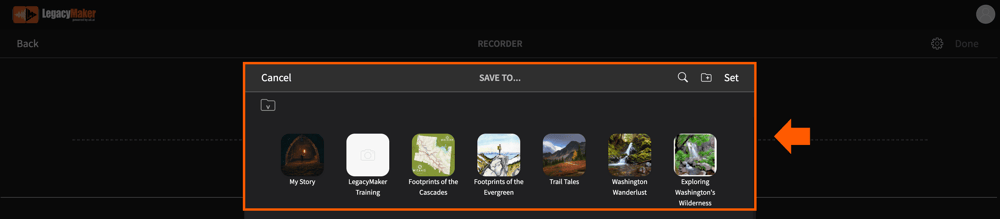
Your recordings will automatically save to Uploads by default, however, you can change this by clicking the link and selecting an existing folder.
STEP #4:
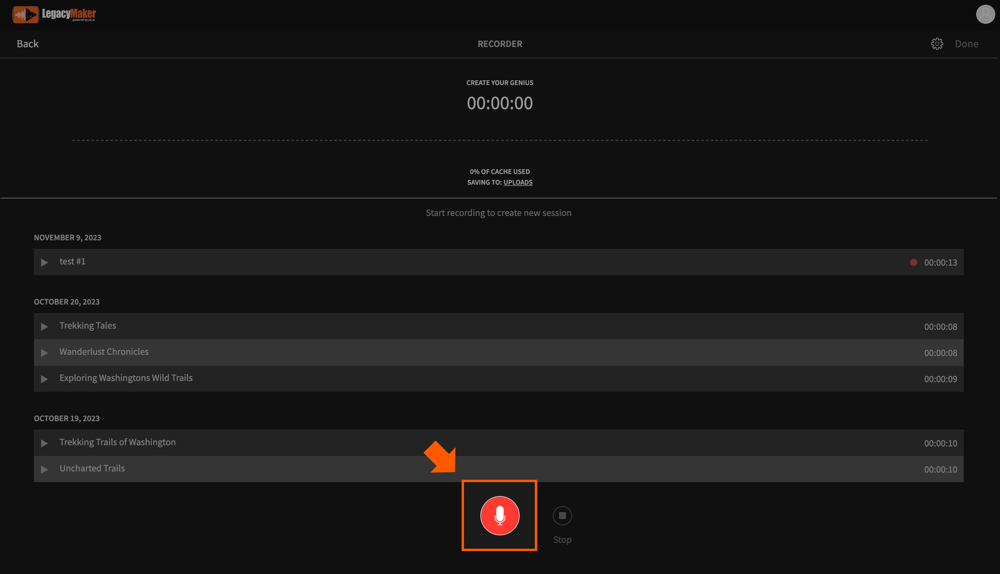
To start a new audio session, click the red Record button at the bottom of your screen.
STEP #5:
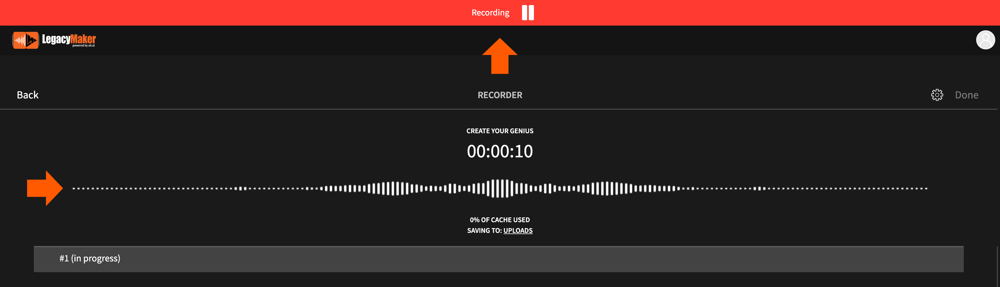
A red “Recording” banner will appear at the top of your screen and the audio bars will modulate to signal an active recorder.
STEP #6:
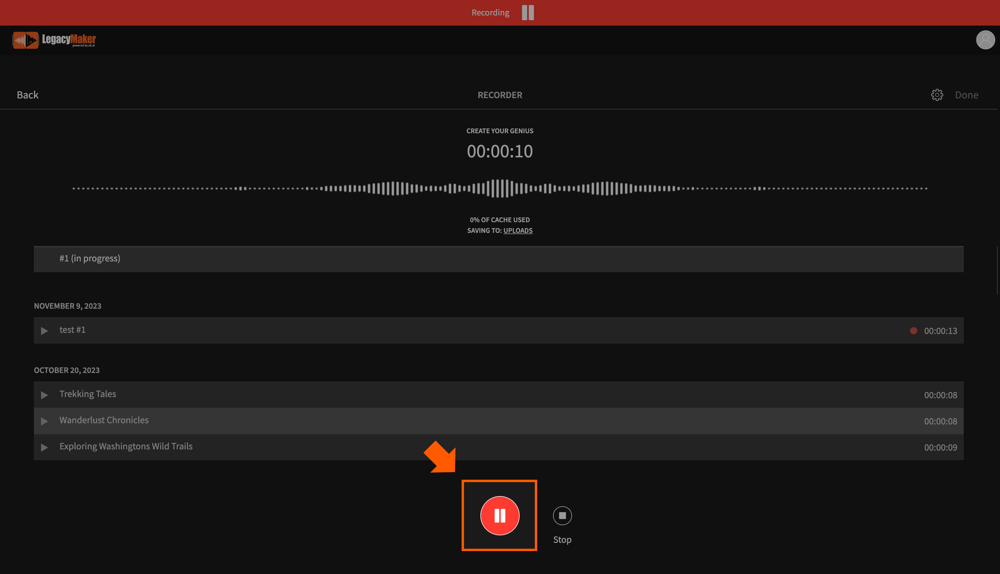
To pause your session, click the red Pause button at the bottom of your screen. You can use the same red button to resume recording if you wish.
STEP #7:
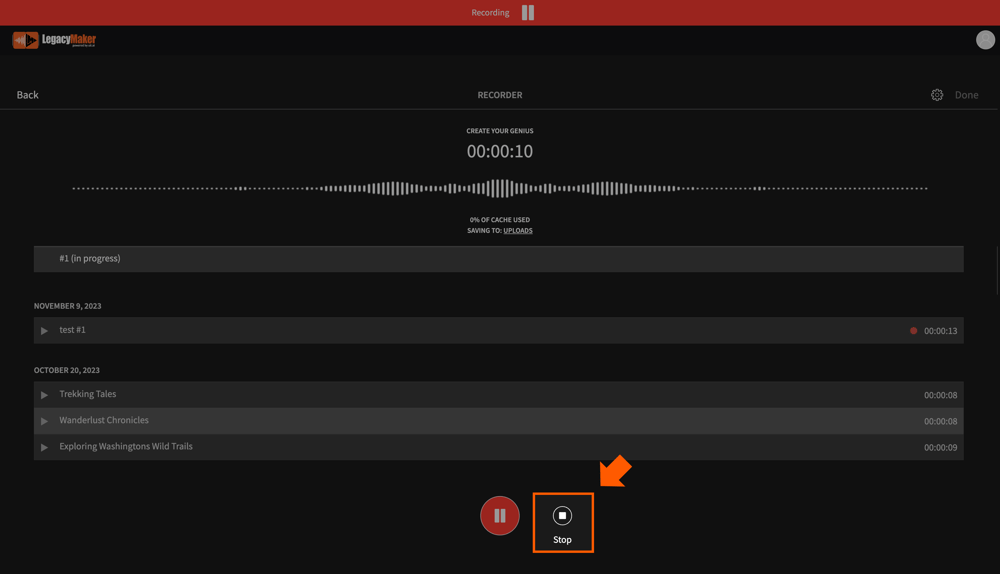
To end your session, click the Stop button.
STEP #8:
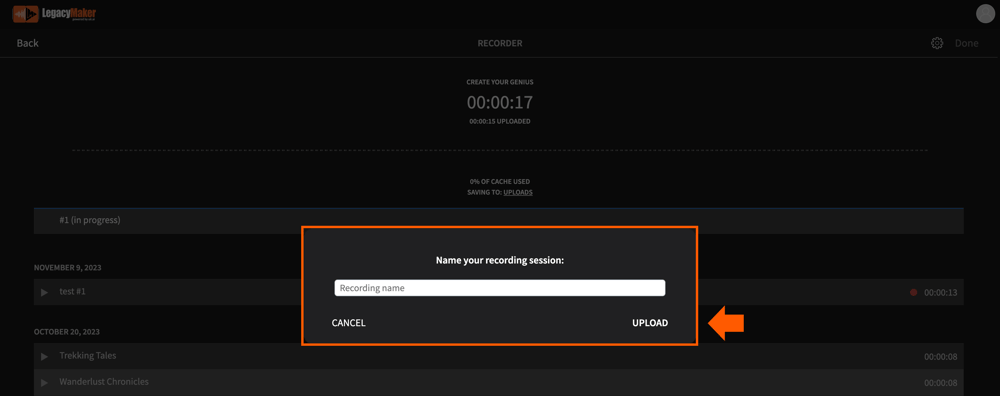
Here you will be prompted to add a title and then click Upload.
STEP #9:
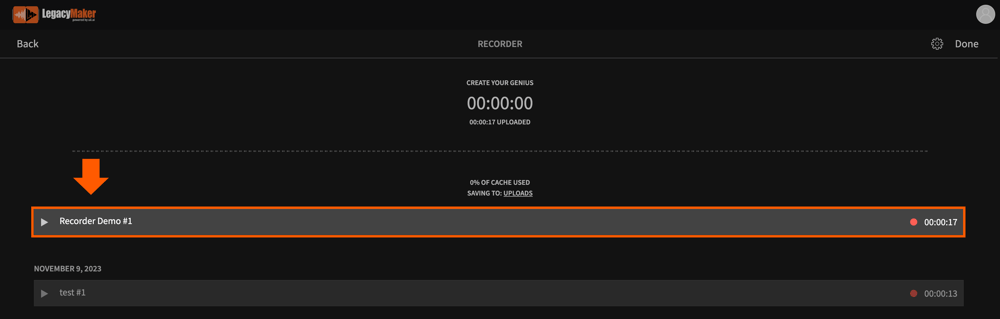
Once your file has finished processing, it will populate at the top of your recent recordings list.
STEP #10:
When you’re finished recording, click Done to finalize, then click Back to return to your dashboard.

STEP #11:
From here, you can access your recordings in the Uploads folder by clicking the cloud icon in the upper toolbar.

STEP #12:
Click Done in the upper right corner to return to your dashboard.

Congratulations, you now know how to access and use the Digital Recorder from the Upper Toolbar. For more guidance on this topic, be sure to check out these related tutorials:
If you have any additional questions, please contact our Support Team at support@legacymaker.co.
RELATED POSTS

LegacyMaker’s instant transcription feature makes it quick and easy to convert your raw audio content into an editable text format, and this step-by-step tutorial will show you exactly how.

Adding content to a folder can be done using the Editor or the Navigation page, but keep in mind that some of the AI-assisted features are not available within Navigation. In this tutorial, I’ll show you how to add content to your project folders using the Editor.

Once you have a project started, there are two ways you can add folders: using the Editor or using Navigation. Both options achieve the same ultimate result, but offer two unique visual experiences depending on your preference. In this tutorial, I’ll show you how to add folders using Navigation, which operates in more of a hierarchical format.
Once you have a project started, there are two ways you can add folders: using the Editor or using Navigation. Both options achieve the same ultimate result, but offer two unique user experiences depending on your preference. In this tutorial, I’ll show you how to add folders using the Editor.
Transforming an idea in your head into a working project shouldn’t be complicated. This step-by-step tutorial will show you exactly how to get started building your first project.
© 2024 ILUVMFG Media, LLC. All Rights Reserved.
PO Box 7846 Bonney Lake, WA 98391